Search this site
South African Wildflowers Come Alive in this Lightroom Tutorial (Sponsored)

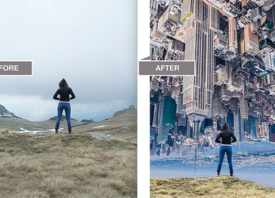
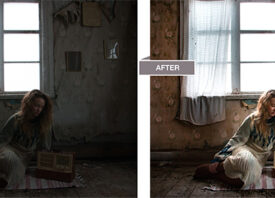
In the lush surroundings of his Cape Town home, photographer Gavin Pickford ventures into the mountains, wildflowers, and coastlines of South Africa. With a passion for dreamy, ethereal landscapes bathed in the dwindling light of dawn and dusk, Pickford has built a name for himself by inspiring more than 80,000 Instagram followers to get up from our laptops and explore the world around us. We asked Pickford to tell us some of the secrets behind his much-coveted post-processing technique using Adobe Lightroom, and here, he walks us step-by-step through his process.
GAVIN PICKFORD: “I like to use Lightroom as a basic editing tool for all my images and will also use Photoshop if I need to remove anything from my images. Below is a tutorial on how I edit using Lightroom.
“Here is the image as a raw file with no editing.”

“So, I start with basic editing, like exposure, contrast (I like a lot of contrast), highlights, shadows, and so on”.

“Then, I add a bit of clarity to bring out the image and add some vibrance to make it pop and drop the saturation to -10. I also then play with the tone curve to try add a bit of tone to my images. You can see already the image is starting to come to life.”


“Next is to add a bit of color with the split toning, I really only add a touch to the shadows to bring out those colors but the highlights I play a lot with depending on the image.”

“Then, just a touch of sharpening and noise reduction. Again, depending on the image, I may use more noise reduction.”


“I then enable lens correction and remove chromatic aberrations and add a touch of vignette around the edges, just to create that dramatic framing, especially if I have a subject in the middle of the image. Then the last few things I do would be to play around with the Graduated and Radial filter to add some more color or drama to the image. Below is the Graduated filter where I have toned down the highlights and added a bit of color to the sky.”

“Then I do a bit with the Radial filter, when working with the Radial filter I invert the mask as shown below to make sure the color I am adding is inside the filter not outside.”

“I like to add that bit of glow if I have shot directly at the sun like in this image, so I normally adjust the highlights and add some orange to it as shown below.”


“Then it’s a simple crop and my image is ready to use.”

“The final step is to save it to your computer so you can use it wherever you want. I normally downsize my images so they can be used in a variety of places like social media. I downsize to J-Peg, resize to fit ‘long edge’ at 1024 pixels and resolution 72 pixels per inch and sharpen for screen at standard setting. This will generally give you an image that is easily manageable to use anywhere.”
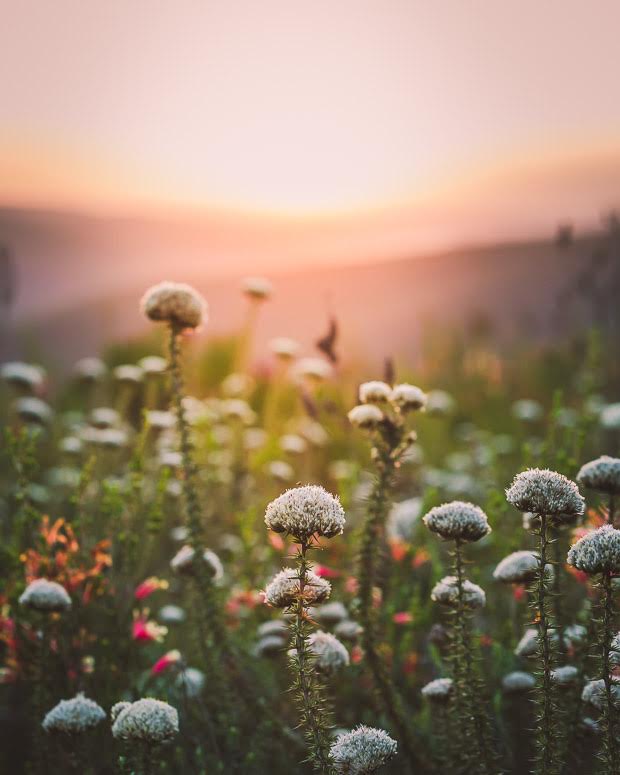 Gavin’s final image
Adobe is a Feature Shoot sponsor.