Search this site
How to Turn the World Upside-Down Using Lightroom and Photoshop (Sponsored)

Amsterdam-based photographer Nana-Ampofo has the restlessness of an avid adventurer, combined with the visual wit of a surrealist. Originally from South Africa, the photographer has traveled through the metropolitan and tucked-away rural corners of central Europe, taking and constructing images that inspire first wanderlust and then daydreams. With his series Tabula Rasa (meaning blank slate), he creates uncanny visions in which the urban and bucolic collide to make something new. Here, Ampofo gives us a behind-the-scenes glimpse into exactly how a composite photo like this is made using Adobe Photoshop and Lightroom.

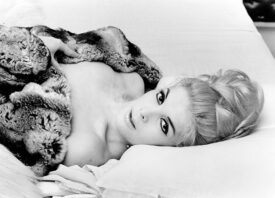
NANA-AMPOFO: “This image forms part of a series of surreal images called Tabula Rasa, featuring a mysterious character traveling across space and time to different locations. The title of the image is Tabula Rasa: The Falling Sky. I will explain my process of blending two images together to create this final image.”
In Lightroom, I edited this image taken in the Bucegi Mountains, Romania, to bring out the color and tonal contrast.
Part 1: Tonal Contrast, Colors, and the Model from Romania.
“I wanted to create a sharp tonal contrast and bring out the colors on the ground and particularly on the model. I used Adobe Lightroom CC to accomplish this by using the main ‘Tone’ tab to remove the effect of the overexposed skies (remove the Highlights and Whites) then to bring out the the model, I adjusted the Blacks and Shadows settings.”

“To balance out the tones, I then adjusted the tone curve, as shown in the screenshot below.”

“Next, I brought out the colors by adjusting the Temperature, Presence, Luminance and Saturation. Keep in mind the goal was to create a sharp contrast and bring out some vivid colors. Vivid but not over-saturated.”

Part 2 – The Falling Sky
“This second image was taken on an open-door helicopter flight over Manhattan.”

“As with the previous image, I’ve adjusted the tones and colors. I used the develop settings from the Bucegi Mountains image and then adjusted slightly. In this case, both images have overexposed skies, but I needed to compensate a bit extra by using one of my favorite tools: the graduated filter. I created the filter and dragged it over the part of the sky to be adjusted.”

“After completing this step, I exported both images and opened up the model image in Photoshop CC.”
Part 3 – Blending it all together in Photoshop
“With the model in Photoshop CC, I used the Quick Selection tool to extract the model and create a separate layer with a mask. Tip: Use the ‘W’ key for quick access to this tool. You can create a smart selection by simply ‘painting’ over an area with the [insert quick select+ icon] icon selected and then clean things up fairly quickly using the [quick select-] part of the brush.”

“After extracting the model, I cleaned up the ground beneath her feet by painting with a black brush. Tip: Use the ‘B’ key for quick access to the brush tool. By painting with a black brush over the mask, I reduced the level of the ground and then made further adjustments by moving the layer downward. Tip: To move a layer, hold the ctrl key and drag and move the layer to your desired position.”

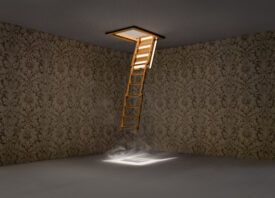
“To add the ‘Falling Sky,’ I dragged the image of the Manhattan skyline into Photoshop, rotated 180 degrees and then moved this layer beneath the model layer.”

“To complete the final image, I moved the model slightly and added a slight gaussian blur on this layer to create a better blend between the foreground image and backdrop. This also helps to blend the sky in the background.”

Adobe is a Feature Shoot sponsor.